Investigating an Unfamiliar File with Synapse
by savage | 2024-05-20
When introducing analysts to Synapse, one of the questions we frequently hear is a variation of "what would this workflow look like in Synapse?" or "how would you approach investigating this in Synapse?" Here, we’ll walk through using Synapse to conduct a short investigation into an unfamiliar file, highlighting how an analyst might add an indicator to Synapse, use Synapse Power-Ups to query third party data sources for more information, pivot to review related data, and apply tags to keep track of information of interest. We’ll start out with a SHA256 hash of a file that we’ve been asked to look into, and attempt to determine whether the file is malicious, what kind of activity or malware family it may be associated with, and whether there is a C2 or additional related indicators that we can identify.
If you’d like to follow along yourself, feel free to do so by requesting a Synapse demo instance. Once you have your demo instance, navigate to the Research Tool and switch the Query Bar into Lookup mode. We’ll be using the following Synapse Power-Ups:
Synapse-AlienVault
Synapse-MalwareBazaar
Synapse-Maxmind
Synapse-MITRE-ATT&cK
Synapse-VirusTotal
Both AlienVault and VirusTotal require users to register for an API key, and offer free/community API keys that should suffice for this exercise (although, the availability of these resources is always subject to change). Instructions for installing and configuring Synapse Power-Ups can be found here.
As always, we suggest that analysts work out of a forked view within their Synapse instance.
Investigating a File with Synapse
Let’s pretend that a colleague has asked for our assistance investigating a suspicious file. Copy and paste the following hash into the Query Bar and hit Enter:
d245f208d2a682f4d2c4464557973bf26dee756b251f162adb00b4074b4db3ac
Synapse will lift the associated hash:sha256 node if it already exists within our instance. If not, Synapse will suggest creating a hash:sha256 node to represent the hash value:
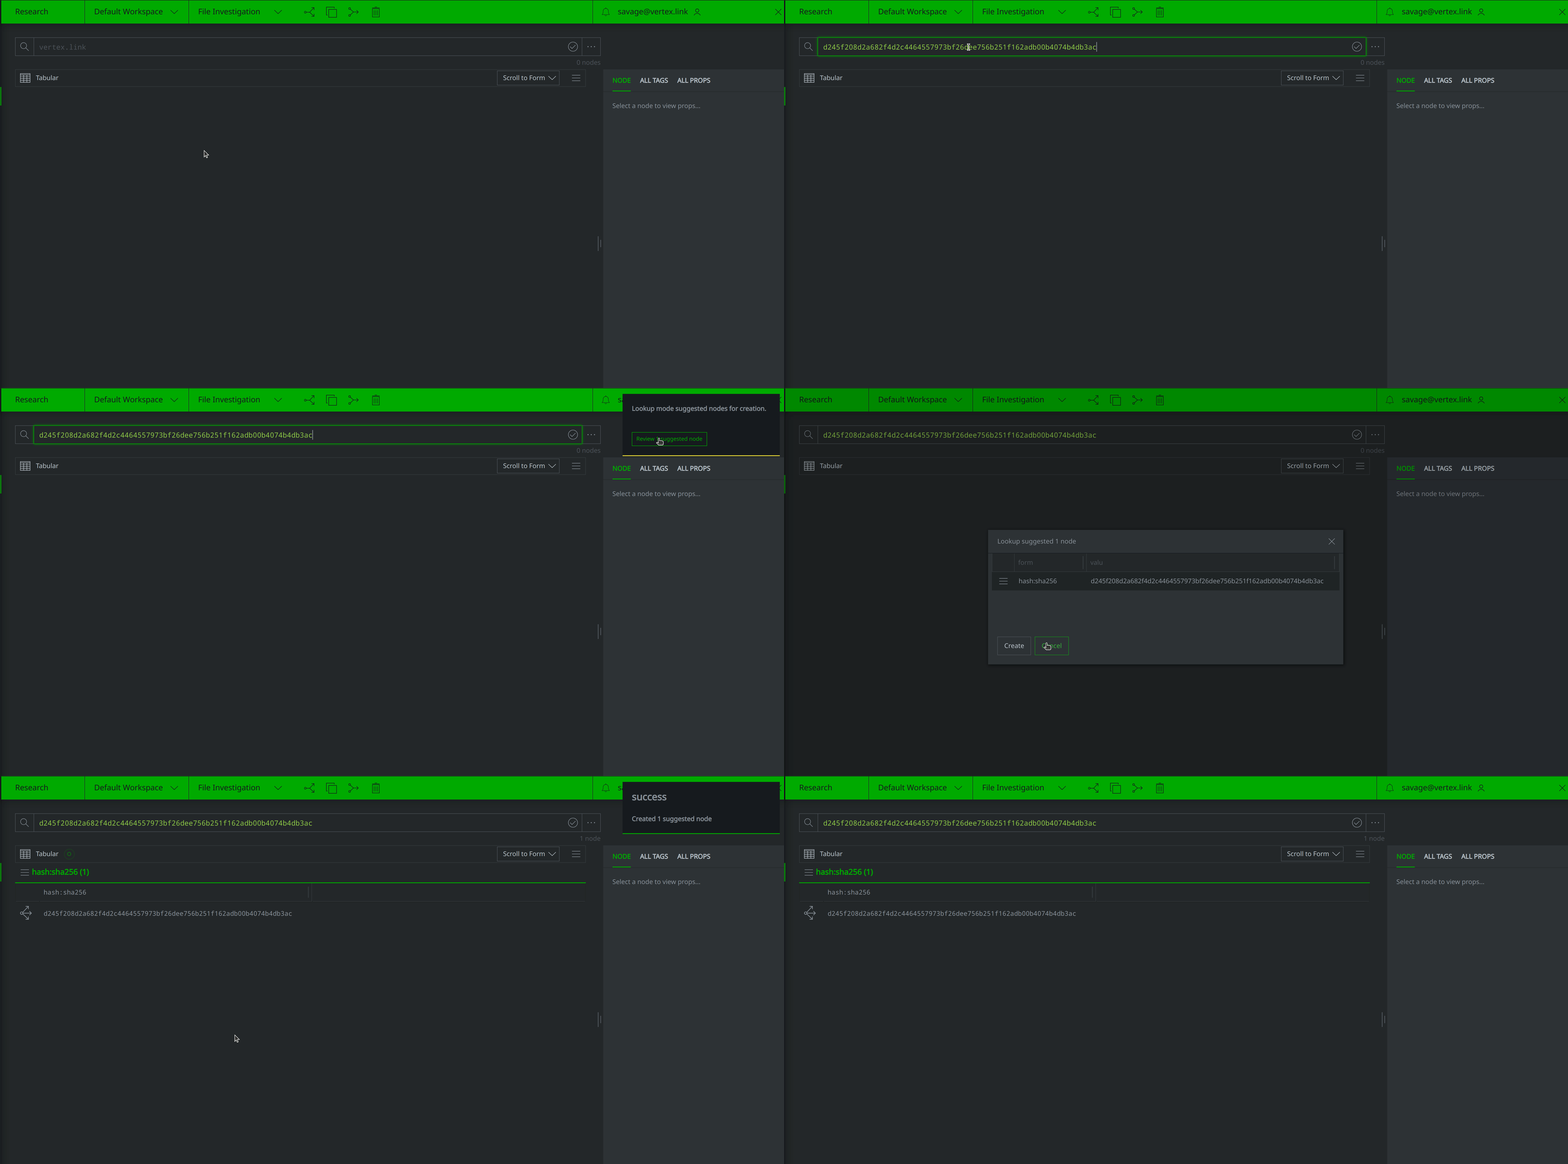
Now that we’ve represented the hash within Synapse, we’ll want to query some of our data sources for any information they may have pertaining to the file. Query VirusTotal for file report and behavior information by right-clicking on the hash:sha256 node and selecting actions > synapse-virustotal > file report and actions > synapse-virustotal > file behavior from the context menu:
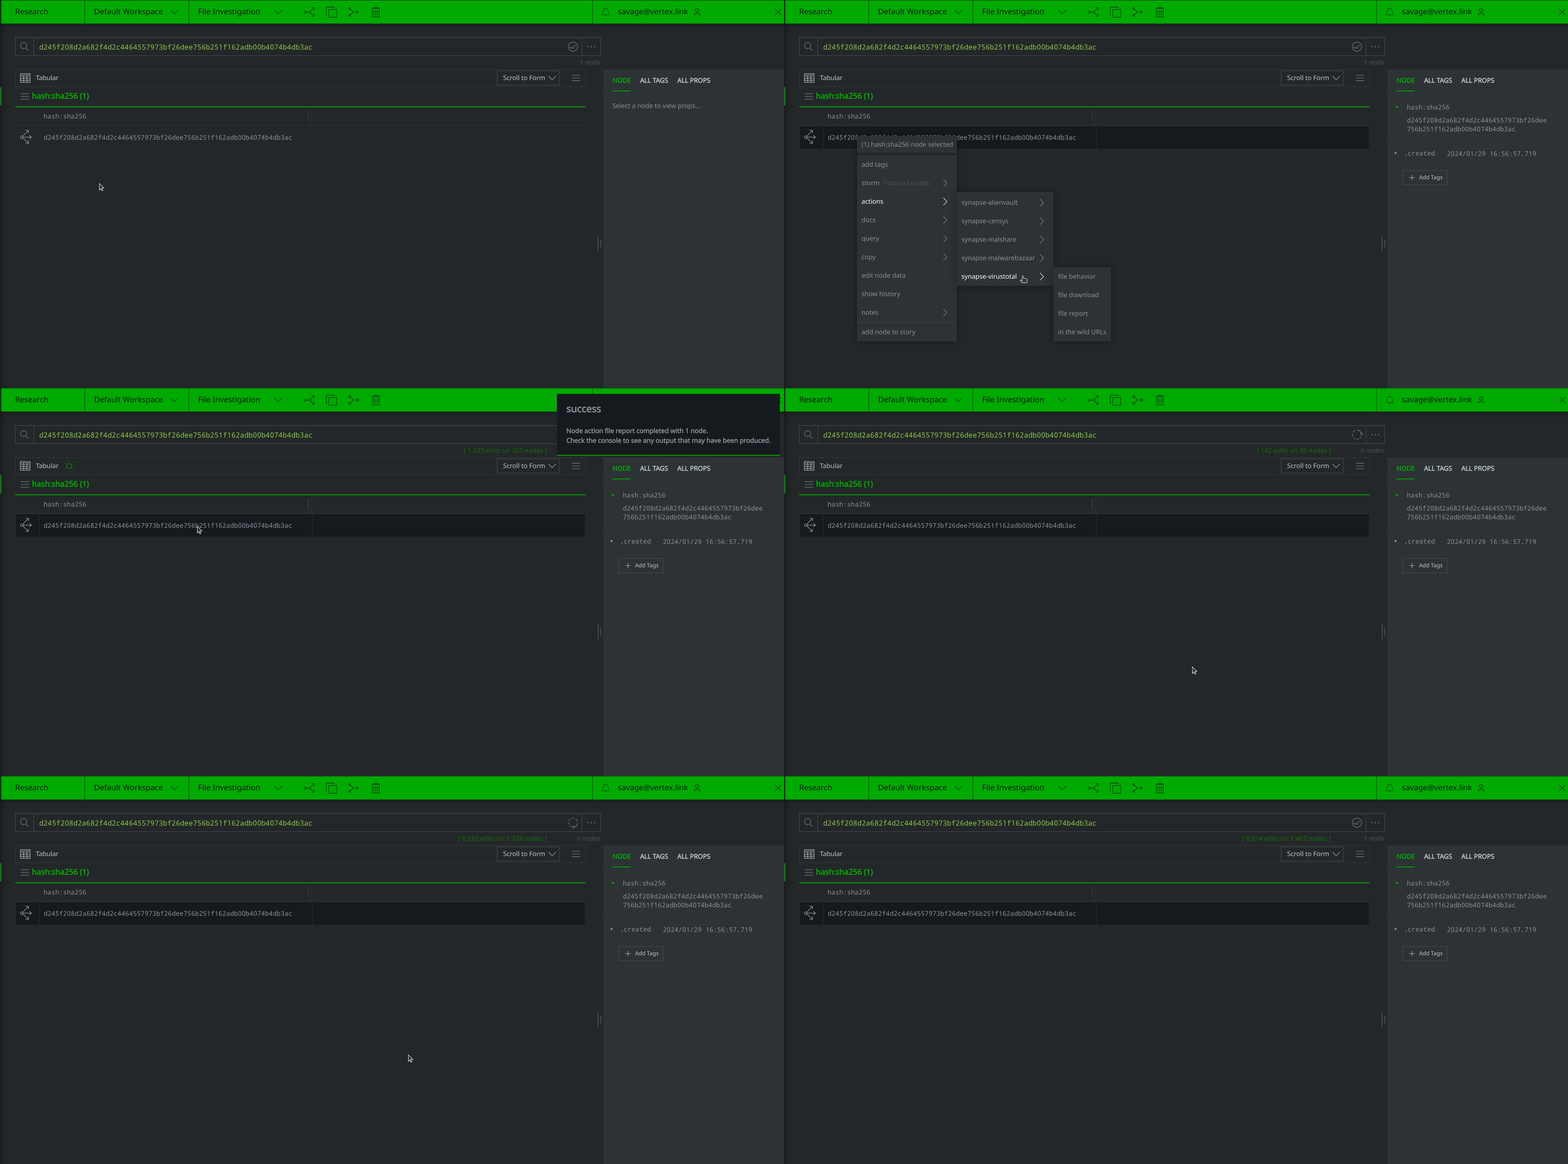
Query and download the file from MalwareBazaar by right-clicking on the hash:sha256 node and selecting actions > synapse-malwarebazaar > malwarebazaar.enrich and actions > synapse-malwarebazaar > malwarebazaar.download to run the Node Actions.
Click the Explore button to the left of the hash:sha256 node to pivot to the file:bytes node representing the associated file. Right-click on the file:bytes node, select "add tag" from the context menu, and apply a #review tag to the node. We’ll use the #review tag to keep track of information of interest during our investigation.
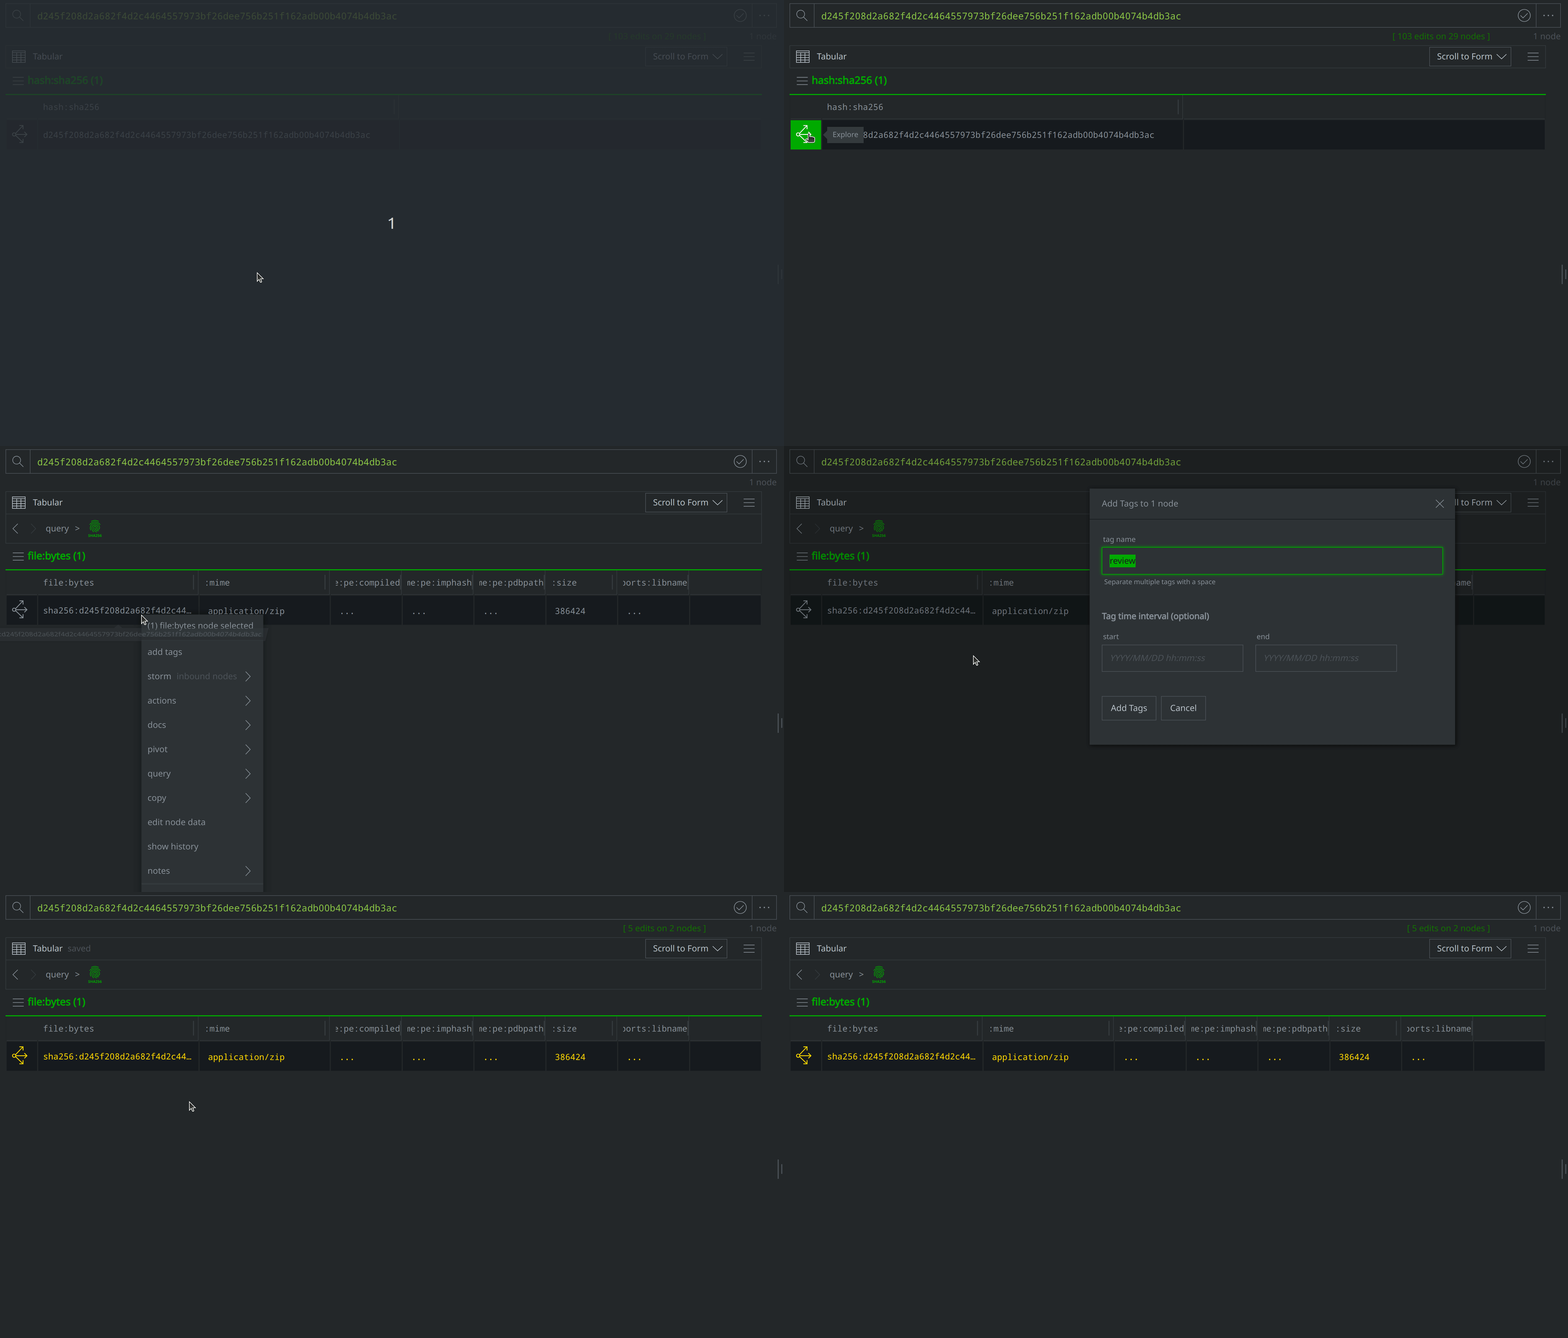
View the node details in the right hand Details Panel. Scroll down past the various file:bytes properties to view the tags codifying assessments from VirusTotal and MalwareBazaar. The VirusTotal tags make note of several behaviors associated with the file, while the Malwarebytes tags indicate that the file is related to APT ("Advanced Persistent Threat") activity and activity known as "konni."
If we’re unfamiliar with Konni, we can search our Synapse instance for more information by using the Query Mode Selector to the left of the Query Bar to switch to Text Search mode, then typing in "Konni" and hitting Enter. This will lift existing nodes that contain the term "Konni" in one of the property values. Depending on the existing data within your Synapse instance, these may include media:news nodes and it:mitre:attack:software nodes, among others. Use the Scroll to Form feature to lift the it:mitre:attack:software nodes, then look for the node where the "konni" is the :name property value:
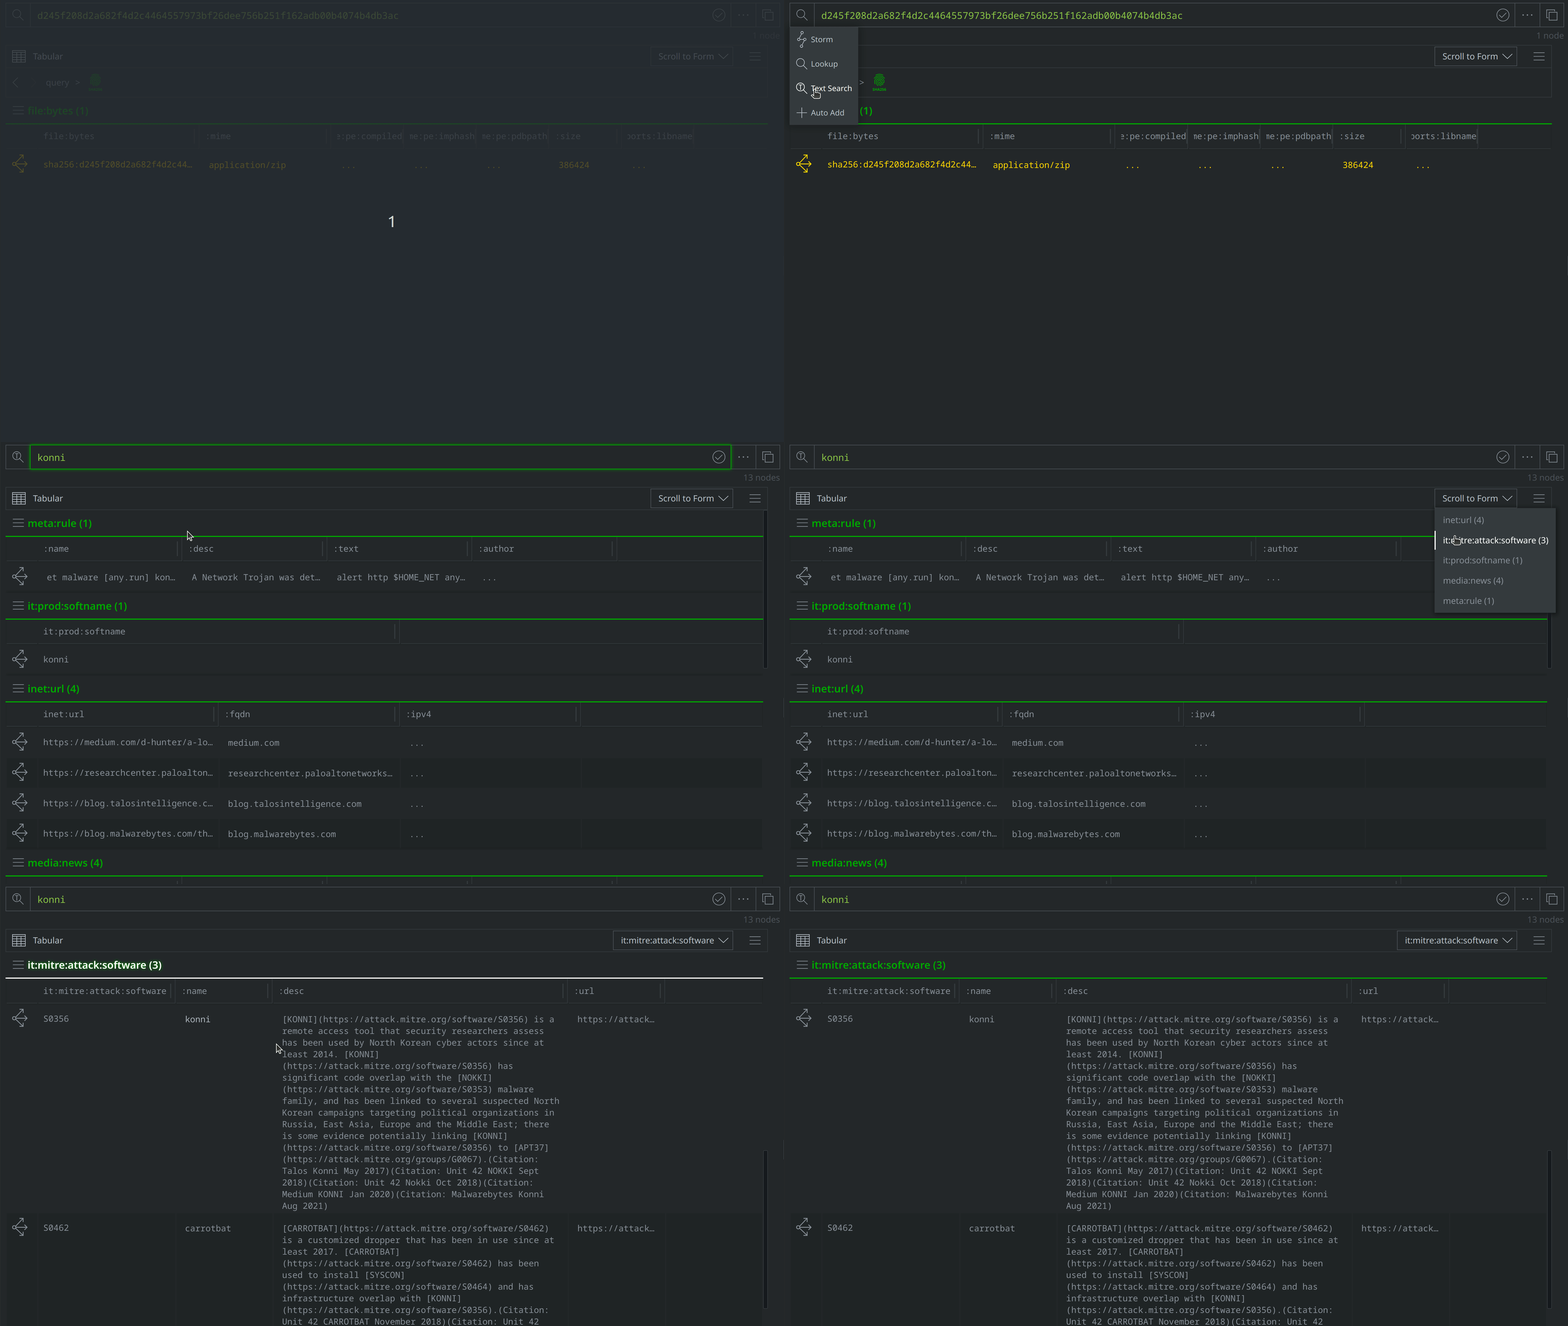
In the :desc property, MITRE describes Konni as a remote access tool that security researchers associate with North Korean operators engaged in campaigns targeting political organizations across several different regions. The other it:mitre:attack:software nodes shown represent malware families that security researchers believe are related to Konni based on infrastructure or code overlap.
Now that we know what Konni refers to, switch back into Lookup mode, lift the SHA256 hash again, and use the Explore button to return to the file:bytes node. From the file:bytes node, click the Explore button again to view the data ingested from VirusTotal and MalwareBazaar.
Use Scroll to Form to lift the file:archive:entry nodes. Select them all, and tag them with #review. Then use the Explore button to pivot to the associated file:bytes nodes.
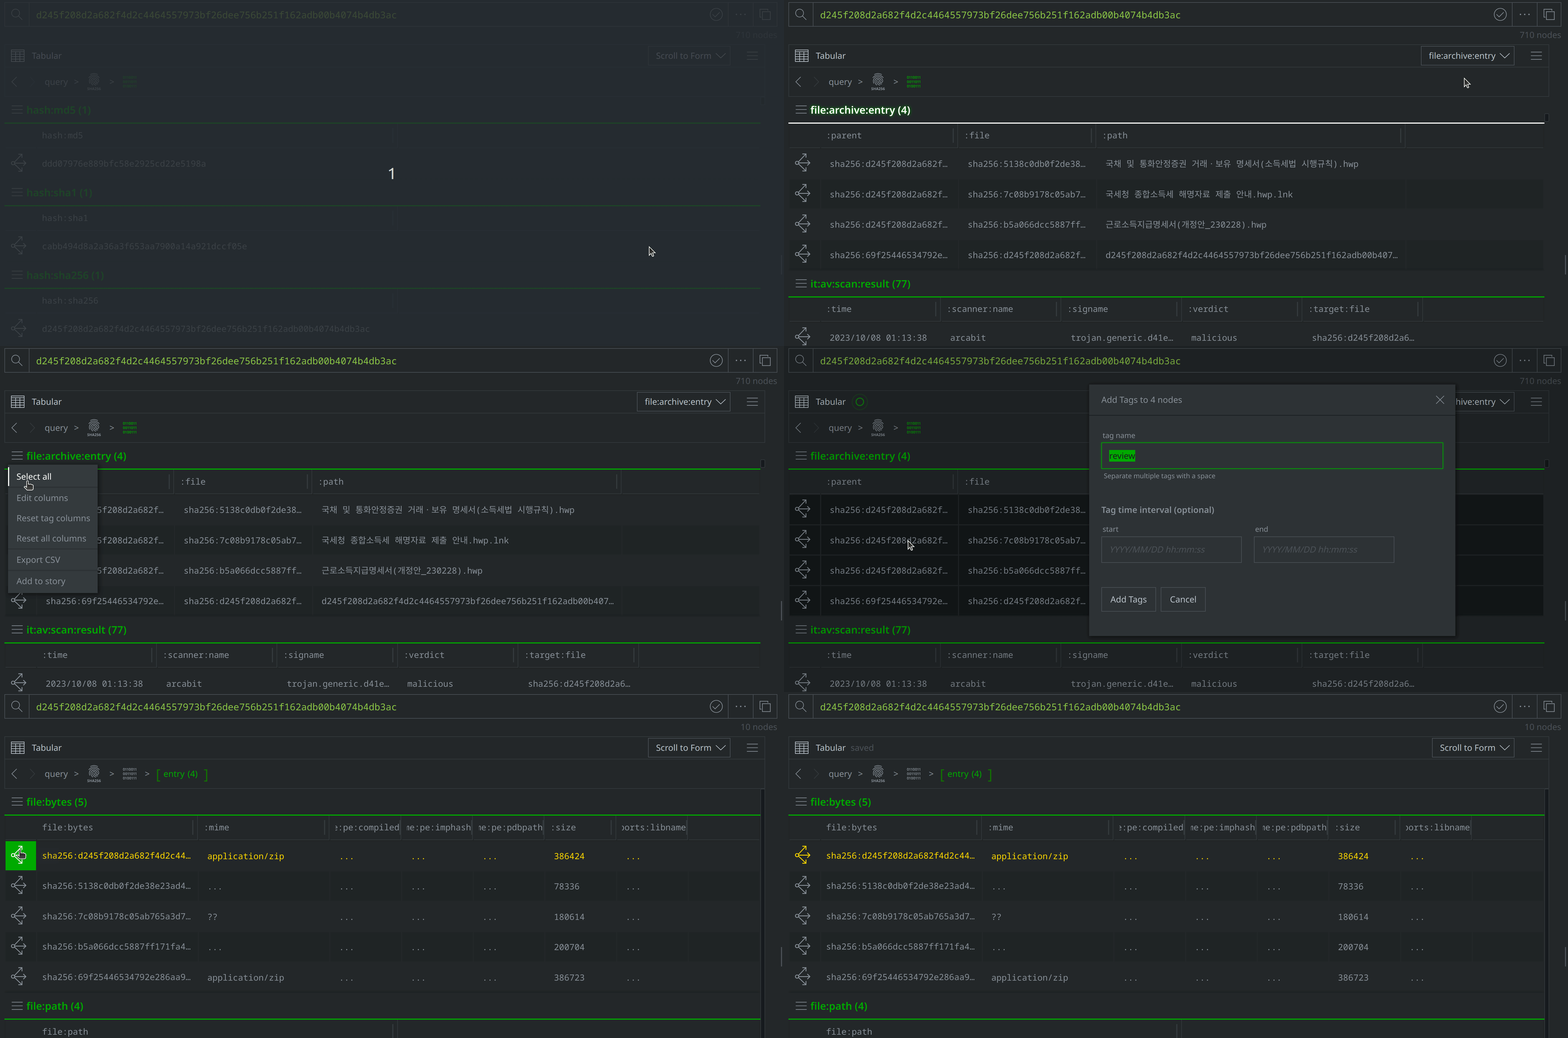
Select the new file:bytes nodes, tag them with #review, then right-click on both and select actions > synapse-virustotal > file report and then actions > synapse-virustotal > file behavior to run the Node Actions to enrich those files.
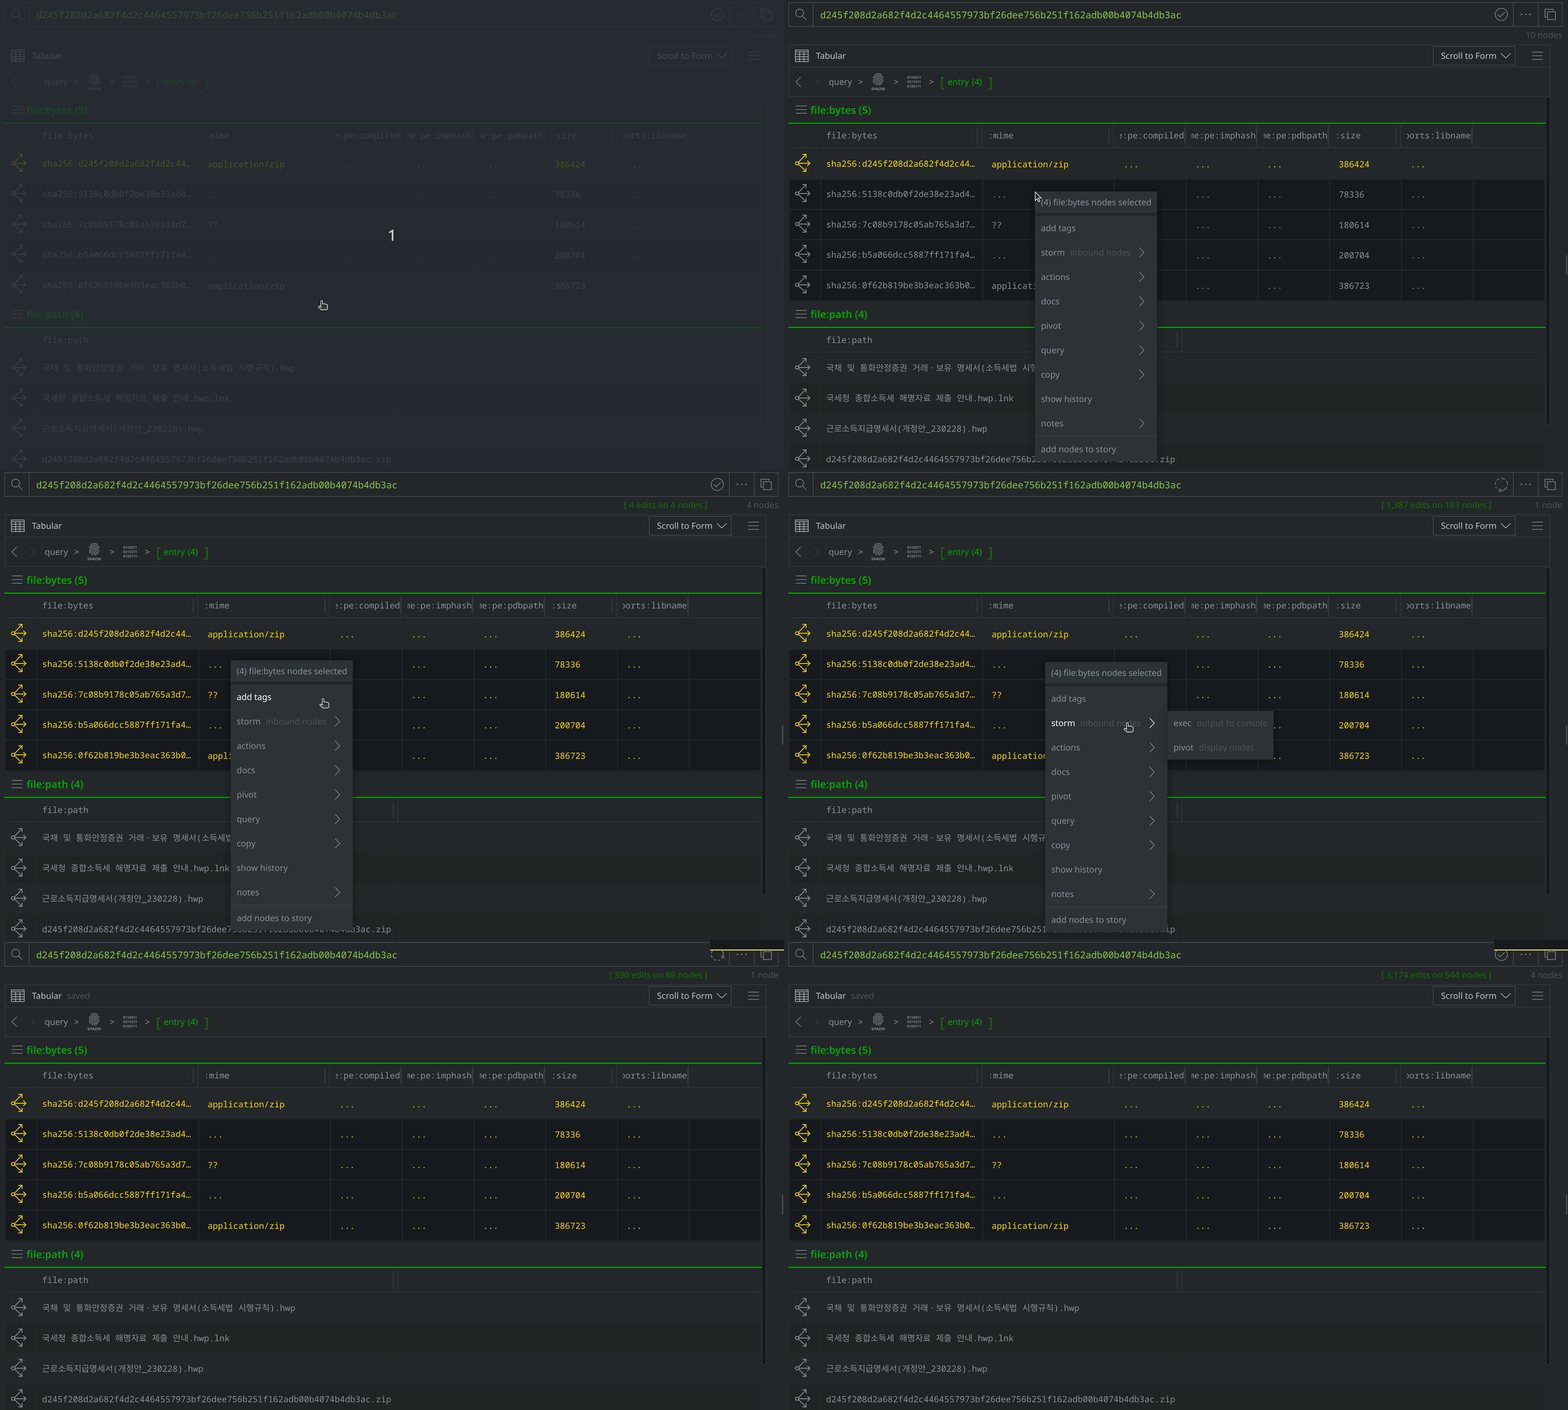
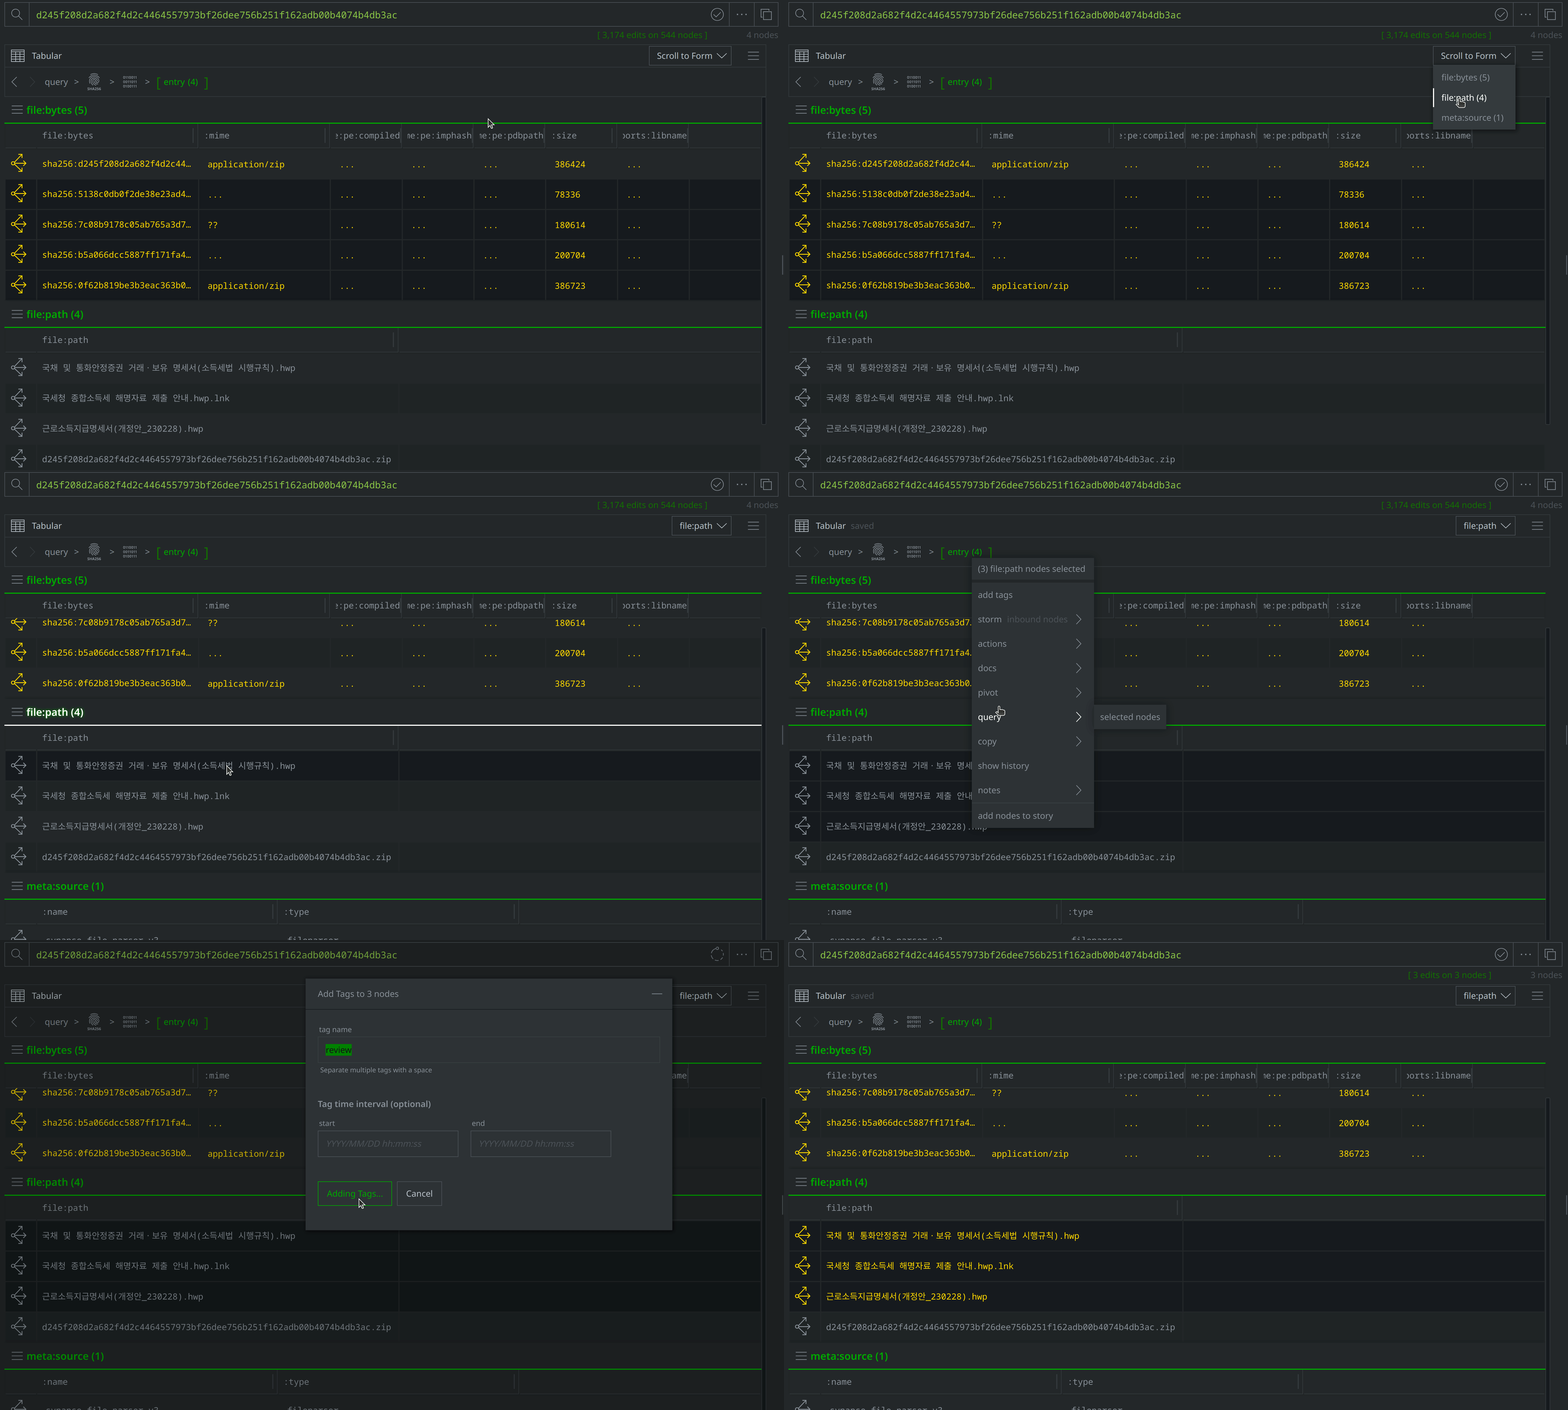
Then use Scroll to Form to navigate to the file:path nodes. Of the four new file:bytes nodes, two are HWP files, one is a LNK file, and another is a ZIP archive. The file:path nodes capture the file names VirusTotal identified for each file. Three file names are in Korean, and translate to "Statement of transactions and holdings of government bonds and monetary stabilization securities (Enforcement Rules of the Income Tax Act).hwp", "Earned Income Payment Statement (Amendment_230228).hwp", and "Guide to submitting comprehensive income tax explanation materials to the National Tax Service.hwp.lnk." These file names suggest that the threat actors intended to target Korean speakers using tax-related lures.
Add a #review tag to the file:path nodes, then use Scroll to Form to return to the file:bytes nodes:
Select and Explore out from our original file (file:bytes=d245f208d2a682f4d2c4464557973bf26dee756b251f162adb00b4074b4db3ac) to review the related nodes, including network communication and file execution details. Apply a #review tag to the it:exec:url nodes showing a request for http://ttzcloud.com/upload.php, and also to the inet:dns:request nodes capturing network traffic to ttzcloud.com:
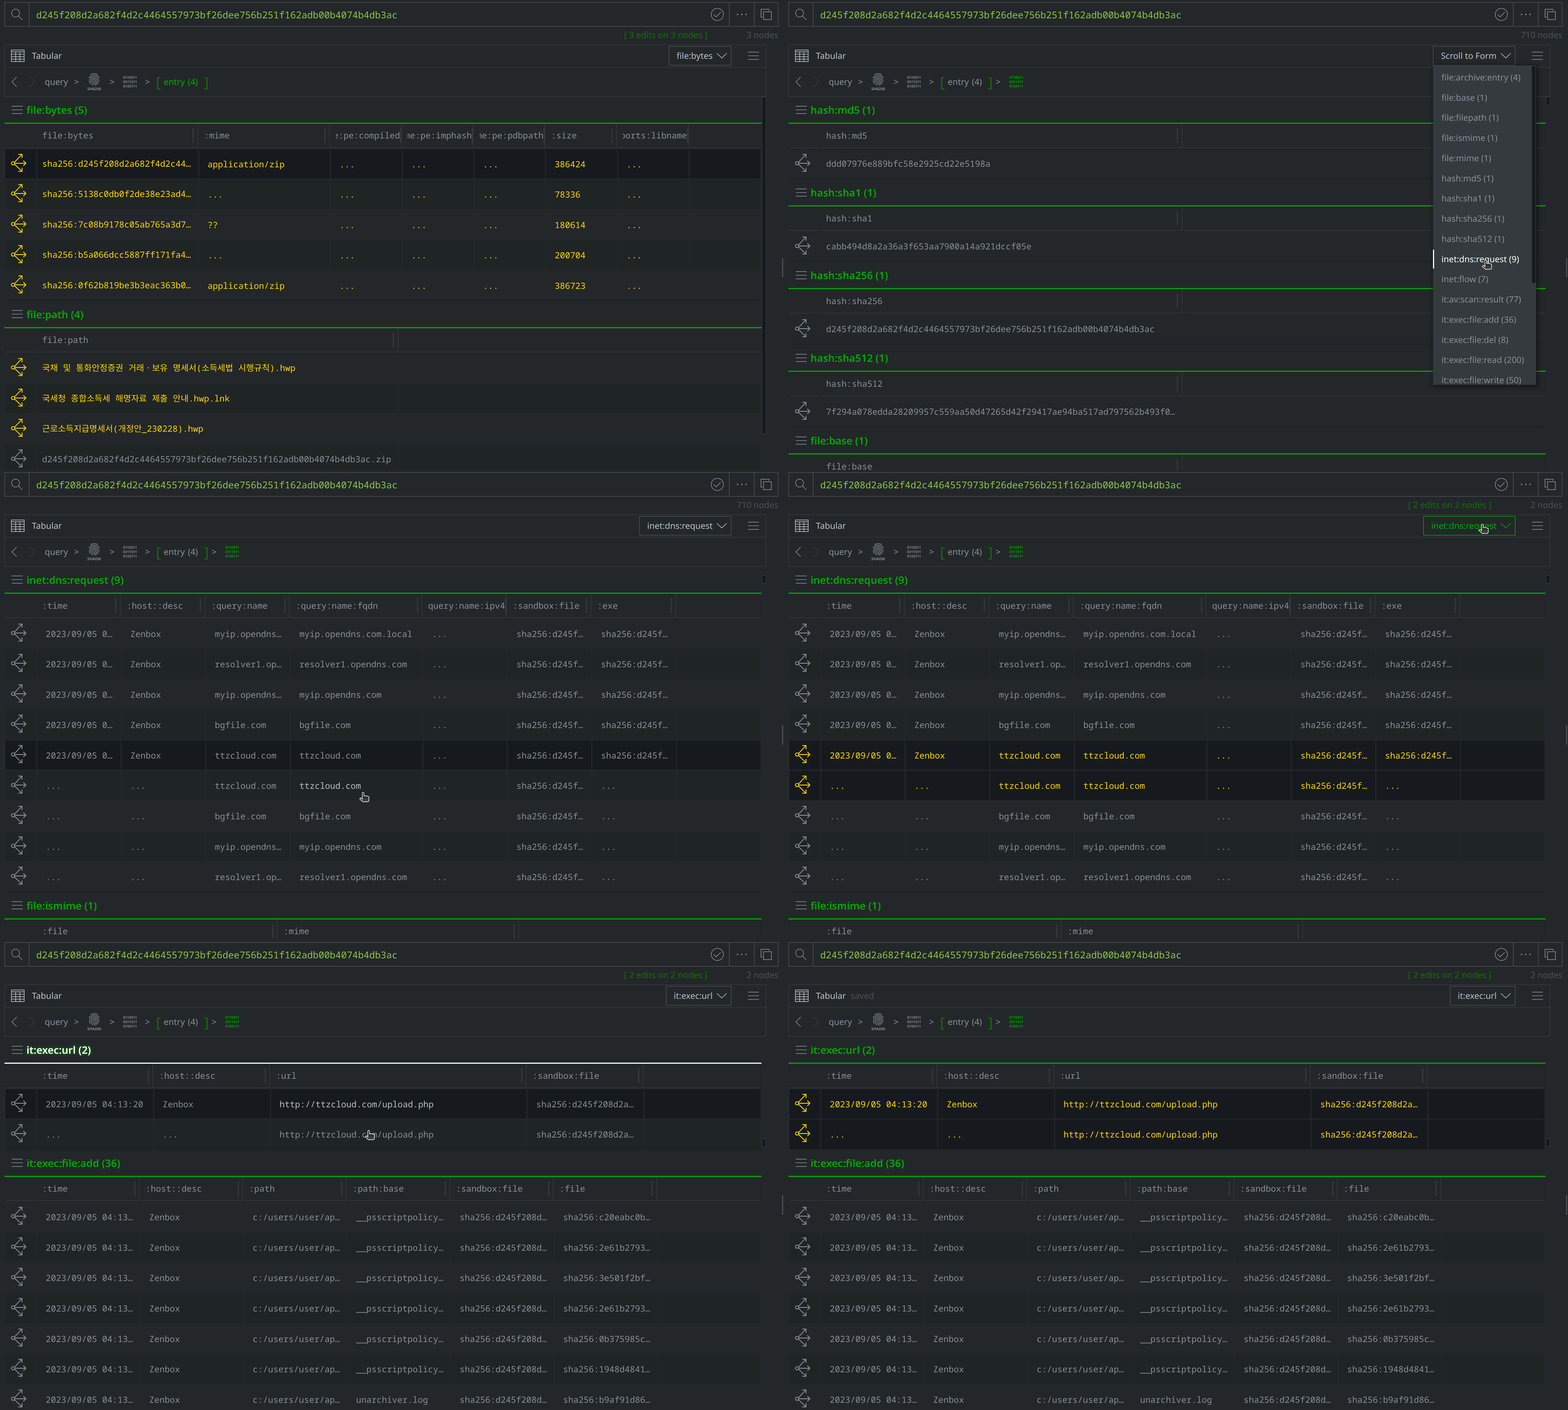
There are also inet:flow nodes noting IP connections, which we’ll want to investigate further to determine whether they represent direct file to IP connections, or if they are instead related to the DNS requests we saw. Select the inet:dns:request nodes where the :query:name property value is ttzcloud.com, and use the Explore button to view related nodes. The inet:dns:answer node captures ttzcloud.com resolving to 88.119.169.96. Apply a #review tag to the inet:dns:answer node, then use the breadcrumbs to step back before navigating to the inet:flow nodes and tagging the nodes showing a connection to 88.119.169.96.
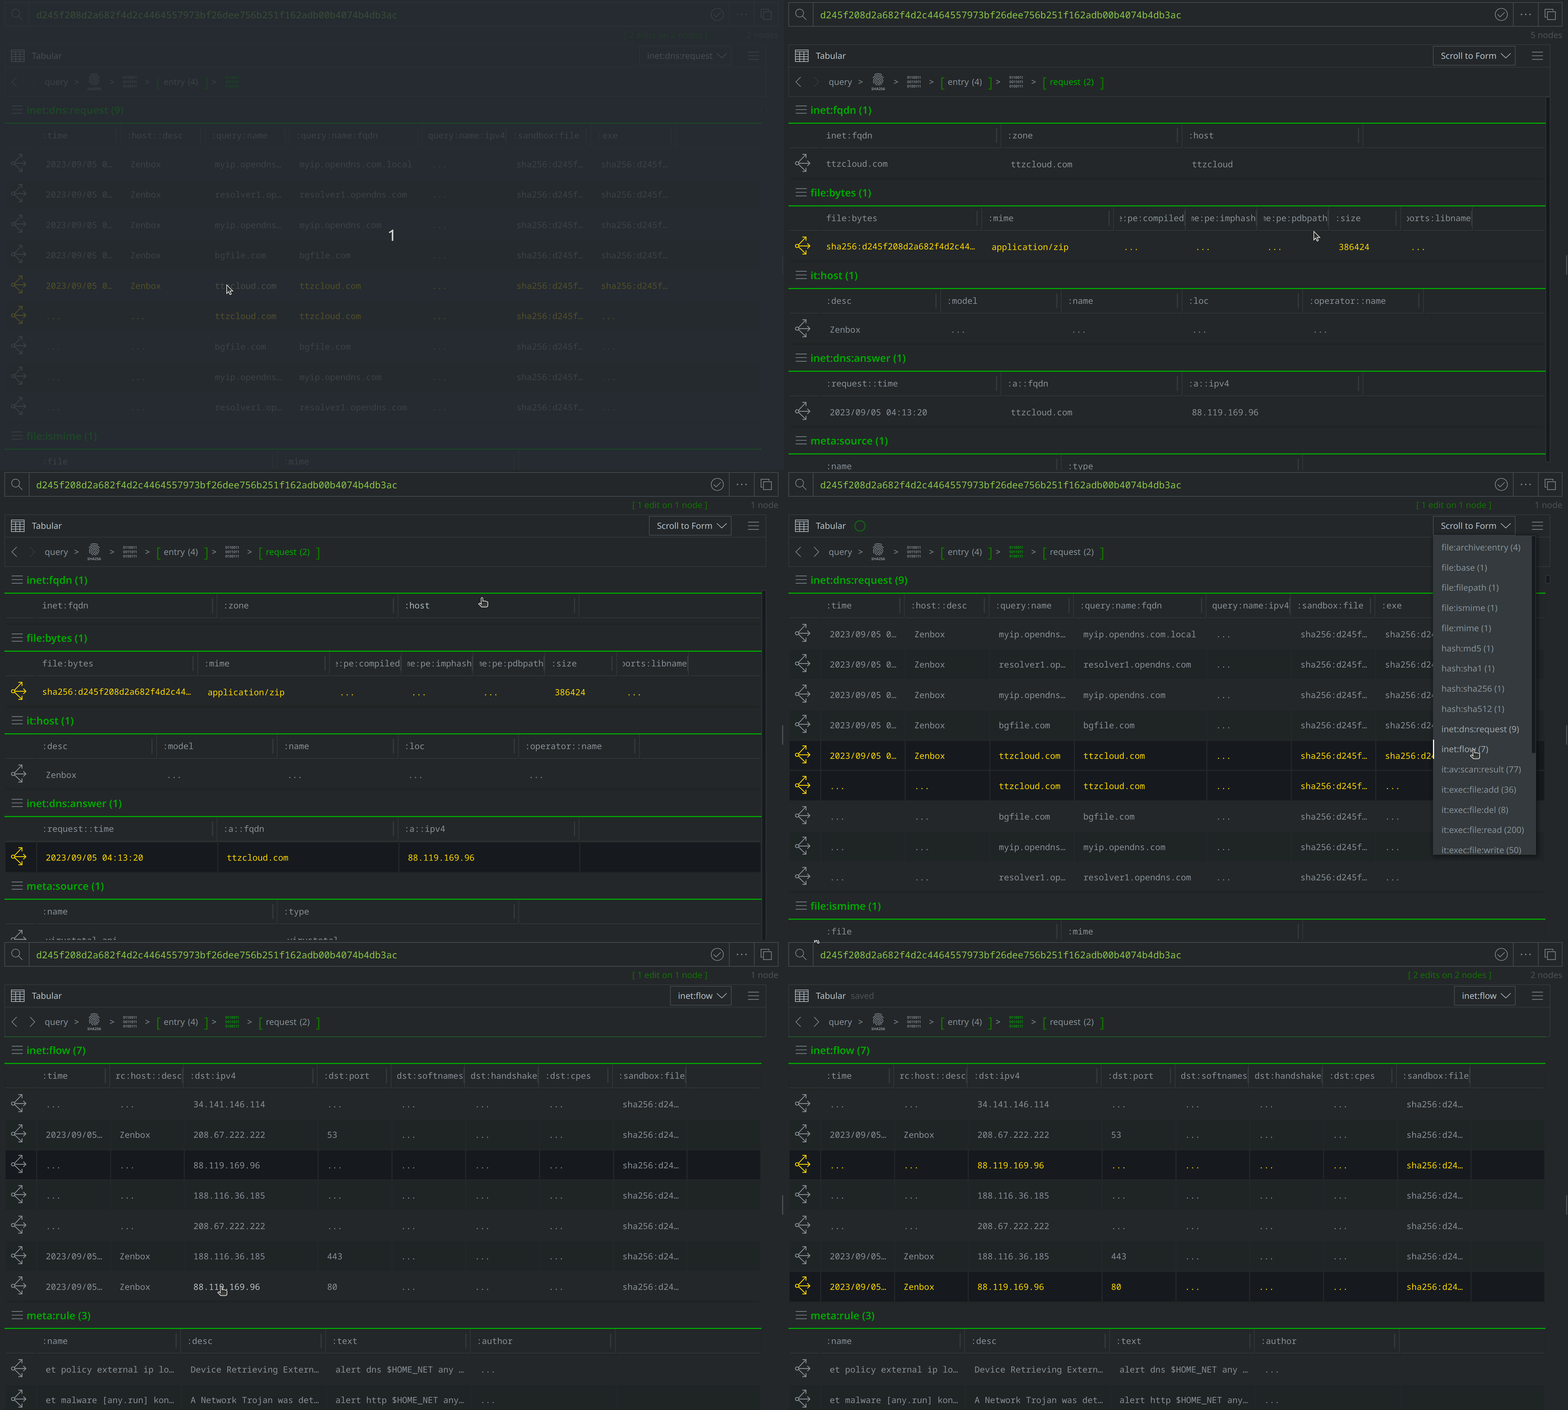
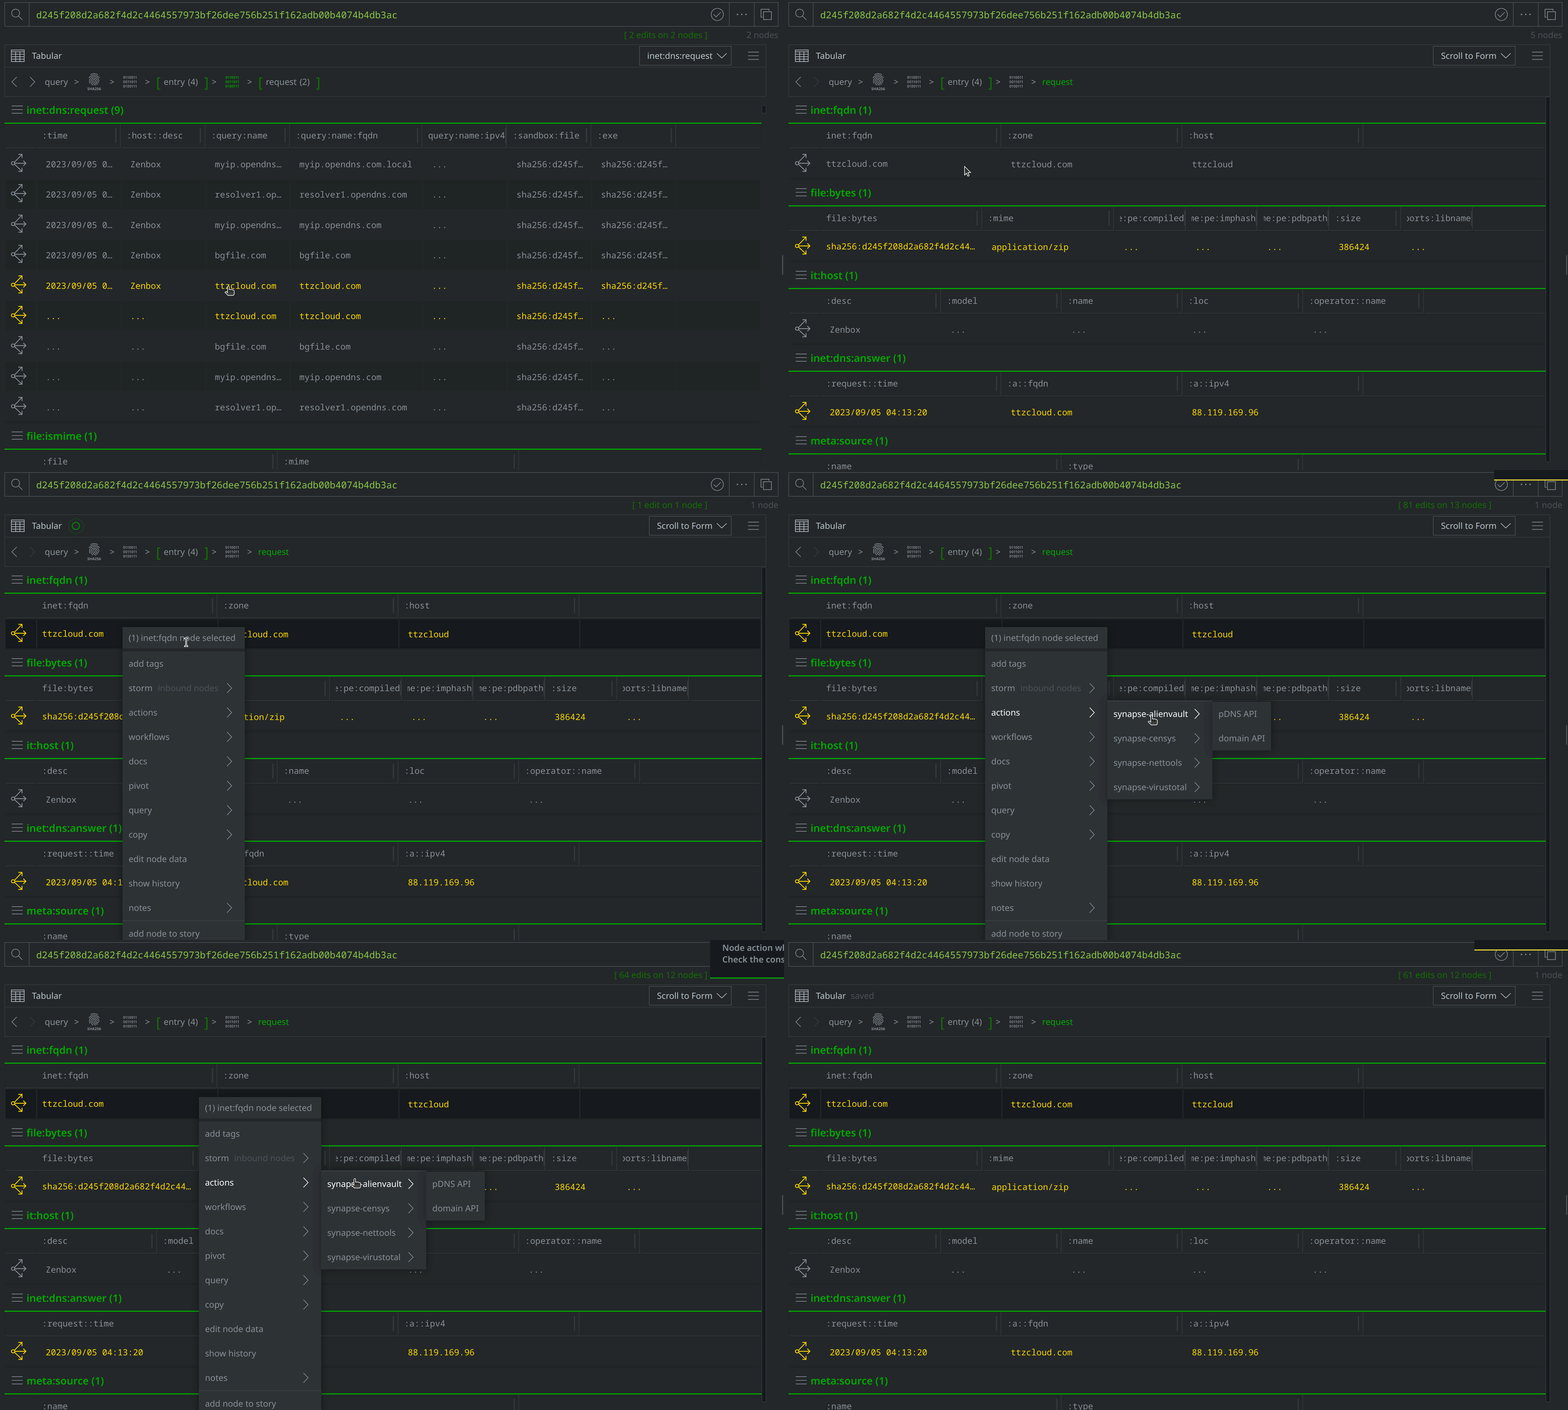
Use Scroll to Form to lift the inet:dns:request nodes and select one tagged with #review. Click the Explore button to navigate to inet:fqdn=ttzcloud.com. Right click on inet:fqdn=ttzcloud.com and add a #review tag, then select actions > synapse-virustotal > communicating files, actions > synapse-alienvault > pDNS API, and synapse-nettools > whois to run those Node Actions:
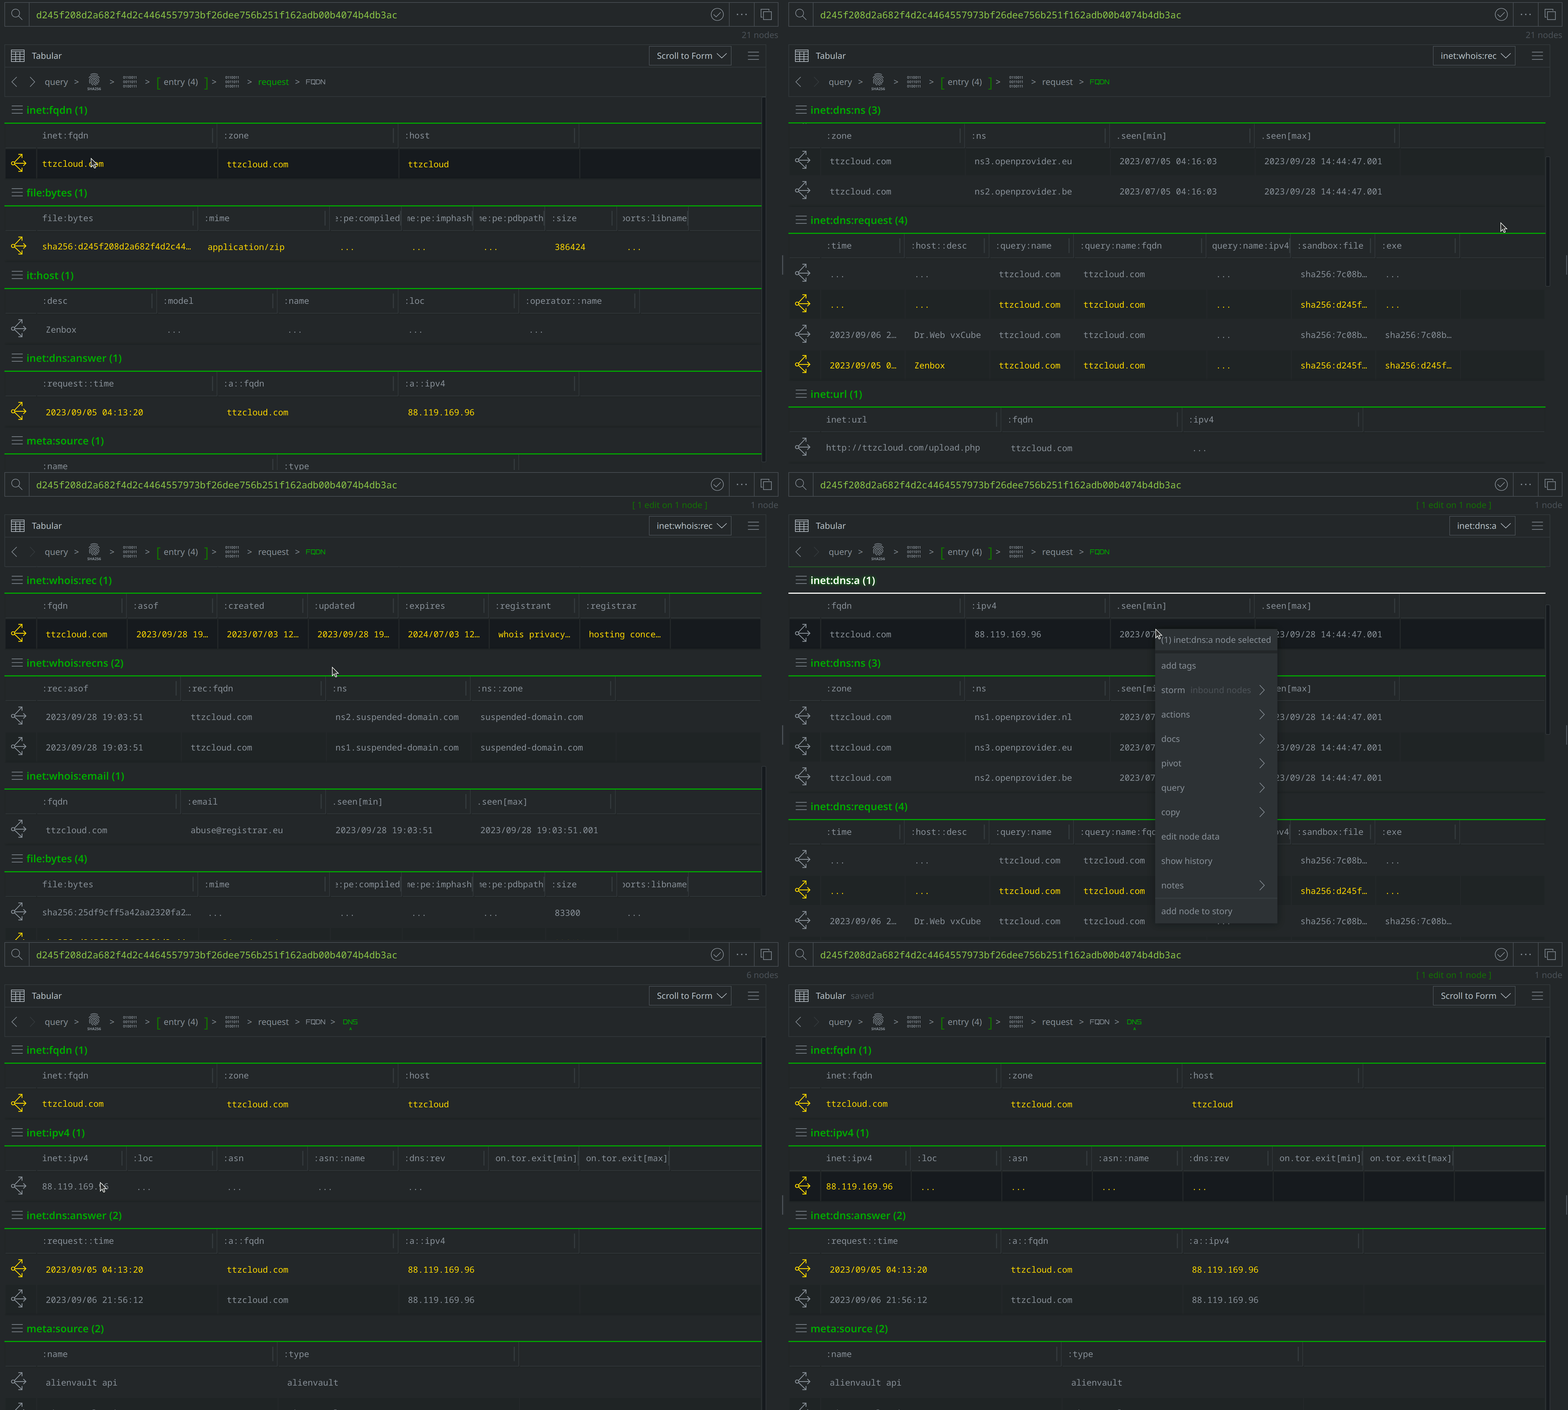
Explore from inet:fqdn=ttzcloud.com and scroll to the inet:whois:rec node representing the WhoIs record and tag it with #review, before scrolling to the inet:dns:a node representing the DNS A record, and tagging that node as well. Then use the Explore button to navigate to the inet:ipv4 node representing the IP address and apply a #review tag:
Right click on the inet:ipv4 node and run the synapse-alienvault > pDNS API and synapse-maxmind > maxmind Node Actions to query AlienVault and Maxmind, then use the Explore button to navigate to additional nodes and check whether there are any new DNS A records brought in from the Synapse-AlienVault Power-Up. There are no new DNS A records, so we can use the breadcrumbs feature to return to the inet:fqdn node.
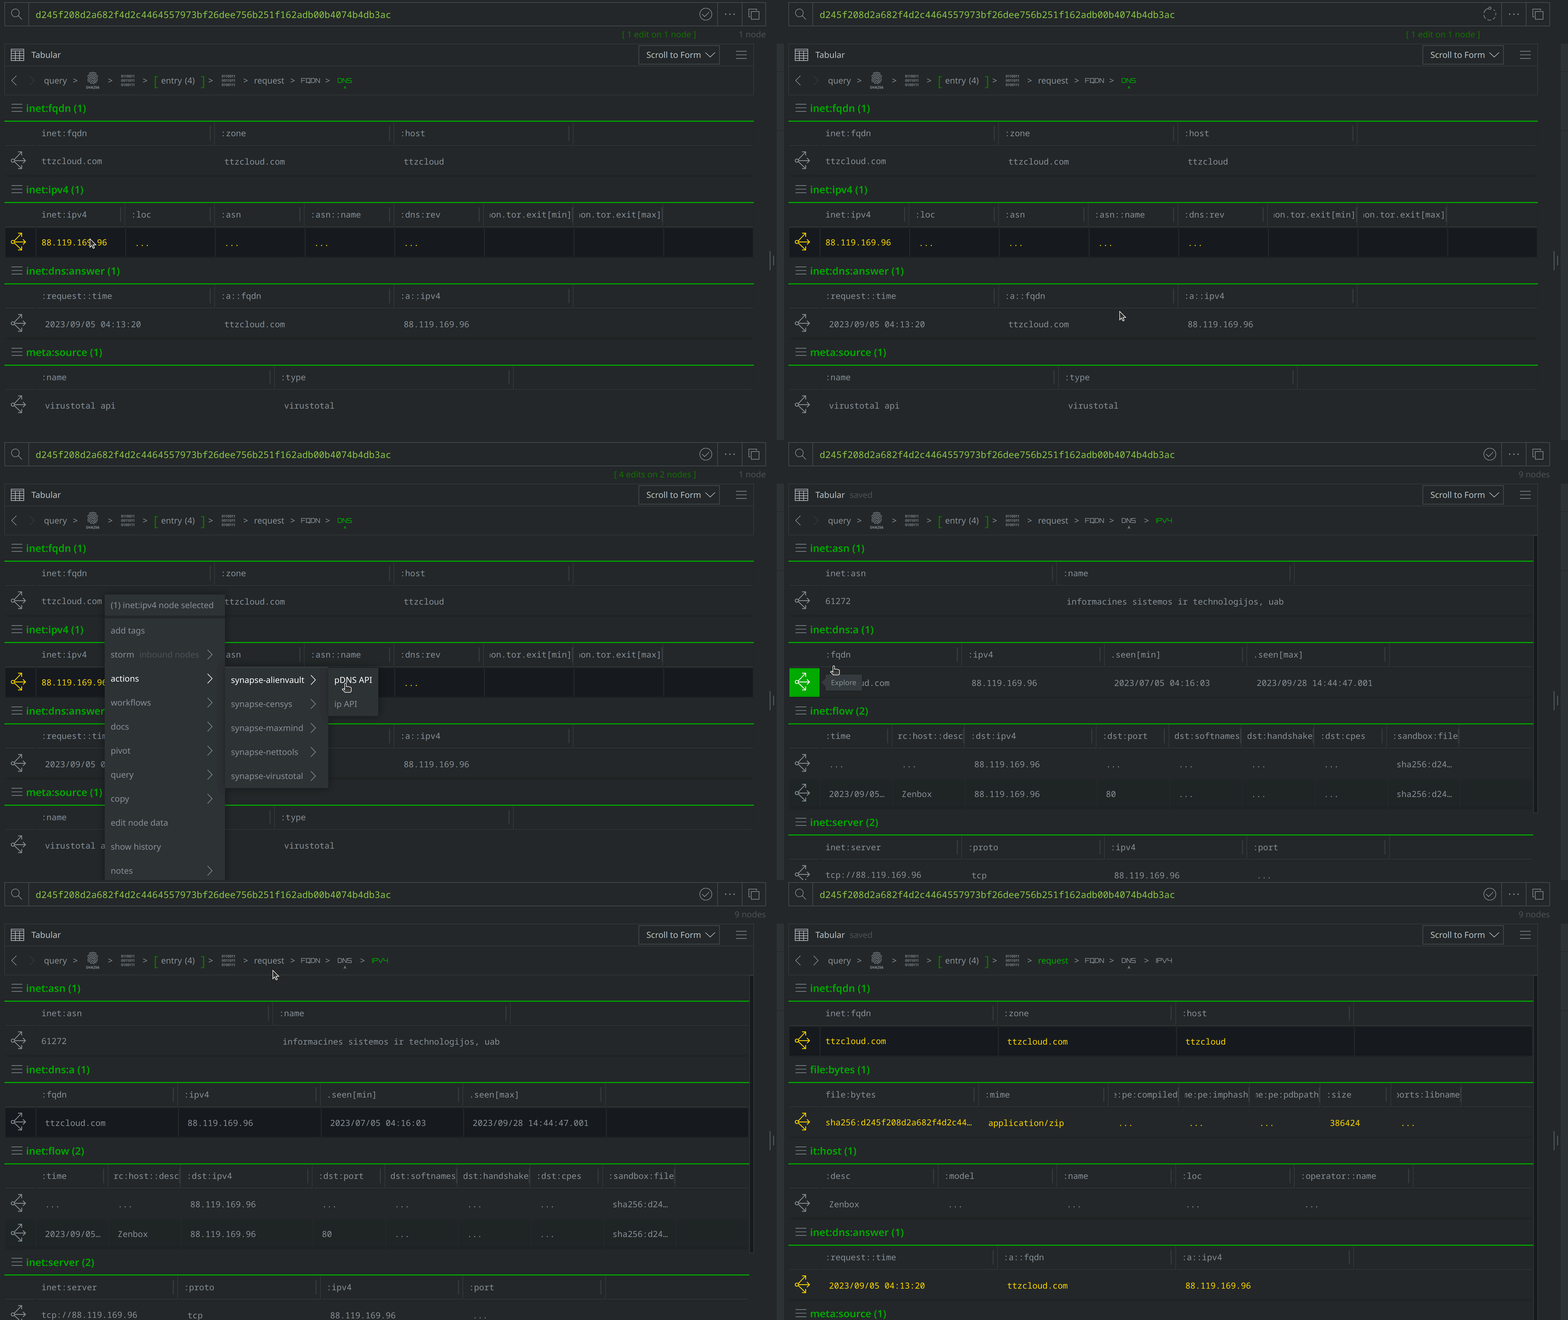
Explore again from the inet:fqdn node and scroll to the file:bytes nodes, two of which we’ve already tagged with #review. There are two new file:bytes nodes, which we had pulled into Synapse by selecting actions > synapse-virustotal > communicating files to run the Node Action. Select the two new files and tag them with #review then run the following Node Actions: synapse-malwarebazaar > malwarebazaar.enrich and malwarebazaar.download, and synapse-virustotal > file report and file behavior. Then individually these then view the tags that those Power-Ups applied. At least one of the files is tagged with #rep.malwarebazaar.apt and #rep.malwarebazaar.konni, just as was our original file.
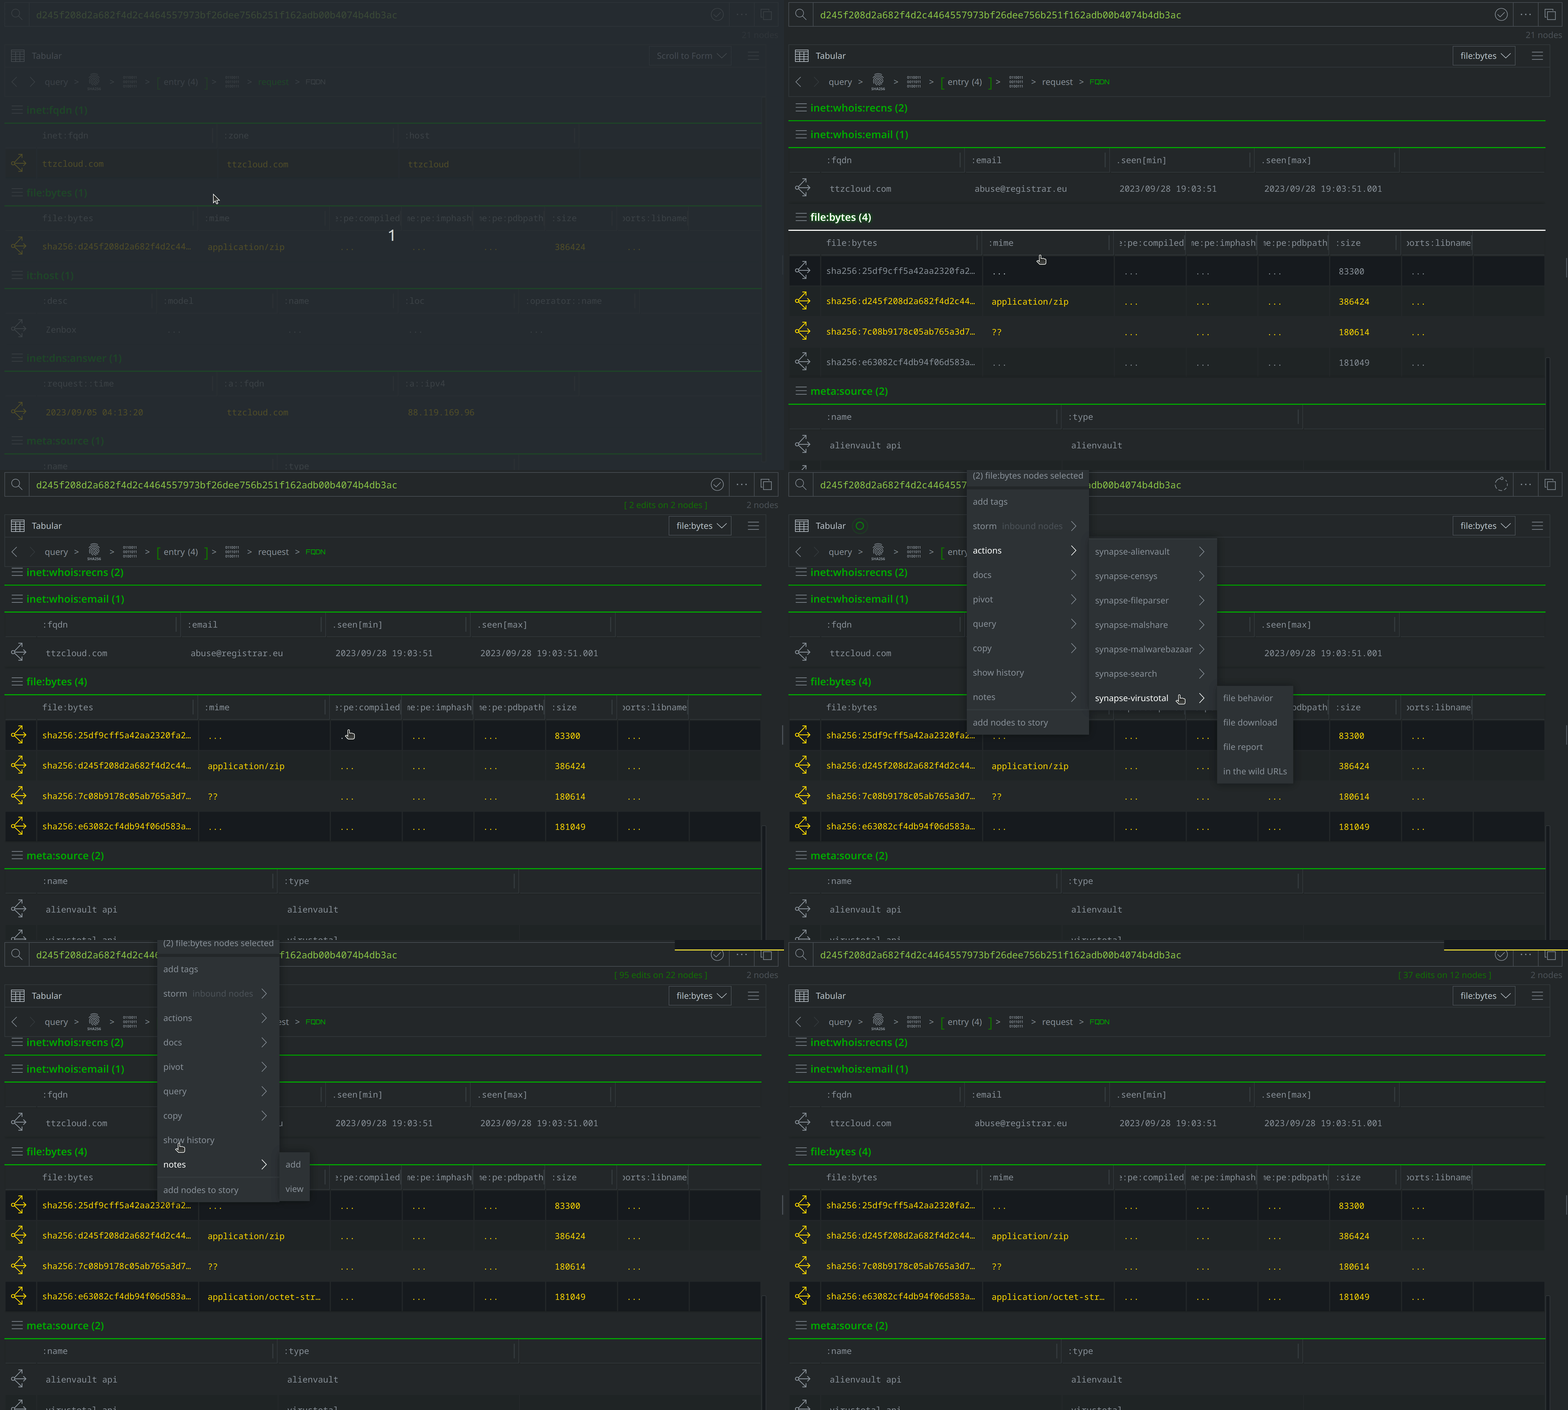
Explore from both new file:bytes nodes to view related nodes. Use Scroll to Form to view the inet:dns:request nodes, some of which document DNS requests to the FQDN ttzcloud.com. Tag those nodes with #review, then use Scroll to Form to navigate to the it:exec:url nodes. Tag the nodes showing a request for the ttzcloud.com URL as well. Use the breadcrumbs feature to return to the file:bytes nodes.
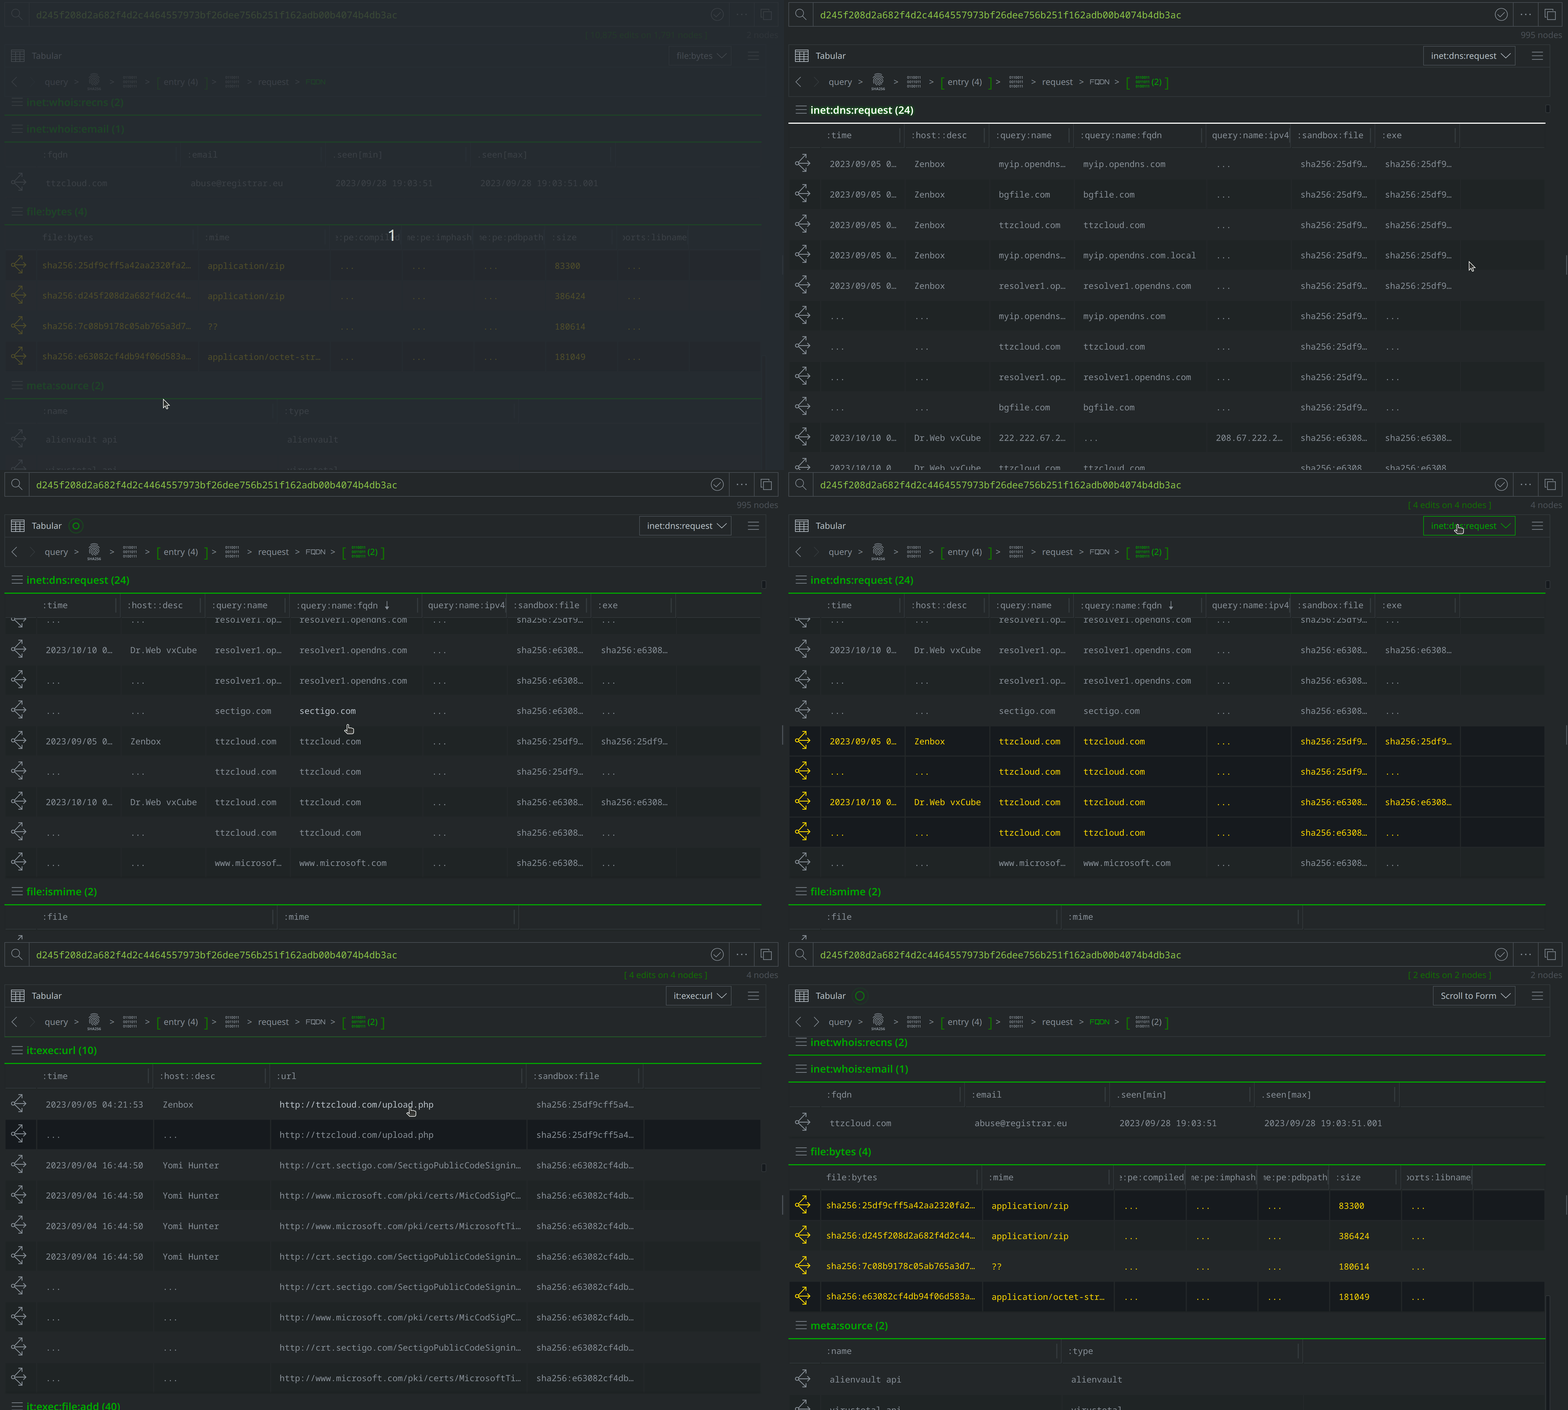
Enter the following in the Query Bar and hit Enter to lift all the nodes we’ve tagged for review so far:
| #review
In this exercise, we worked our way from our initial SHA256 hash to identify additional files, file names that suggest a likely lure theme and targeting interest, as well as a suspected C2 domain and the IP to which it resolves. A MalwareBazaar tag that we’ve seen on two files suggests that they may be related to a malware family known as Konni. Documentation from MITRE ATT&cK notes that researchers have associated Konni with campaigns linked to North Korean operators. For next steps, we would likely want to review our collected data, determine whether the FQDN is indeed the C2, and then compare our files to known Konni samples to try and verify MalwareBazaar’s assessment.
If you'd like to learn more about Synapse, view additional resources, and understand alternate use cases, join our community Slack, check out our videos on YouTube, and follow us on Linkedin and Twitter.
